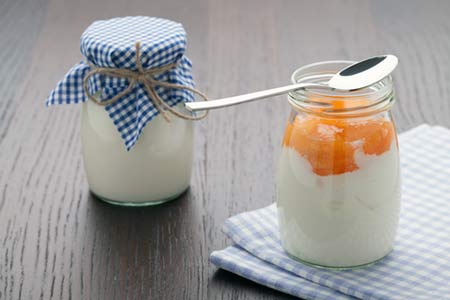
How to Make Creamy Yogurt at Home (No Special Machine Needed)
Learn how to make delicious, healthy homemade yogurt from scratch using just two ingredients. You likely already have everything you need in your kitchen right now.
Why Homemade is Better
Once you try homemade yogurt, it’s hard to go back to store-bought. It’s not just about the taste; it’s about control and quality.
- ✅ Superior Taste: Fresher, creamier, and less acidic.
- ✅ Pure Ingredients: No hidden sugars, thickeners, preservatives, or artificial flavors.
- ✅ Healthier: You control the quality of the milk and the live cultures.
- ✅ Cheaper: A fraction of the cost of store-bought pots.
- ✅ Eco-Friendly: Eliminate all those single-use plastic tubs.
What You Need (Checklist)
You don’t need an expensive yogurt maker machine. The process takes about 25 minutes of active prep time and around 7 hours of waiting (incubation).
🥛 Ingredients:
- 1.5 Liters Milk: Whole (full-fat) pasteurized milk yields the creamiest results.
- Starter Culture: Either 2-3 tablespoons of existing plain yogurt (with live active cultures) OR a powdered yogurt starter culture.
🥄 Equipment:
- Large Pot: To heat the milk (a heavy-bottomed pot is best to prevent scorching).
- Thermometer: Essential for getting the temperatures right.
- Whisk or Spoon.
- Incubation Spot: A way to keep it warm for hours (e.g., a heating pad, a thermos, or an oven with just the light turned on).
Step-by-Step Instructions
1
Heat the Milk (85°C)
Pour the milk into your pot. Heat it slowly over medium heat, stirring frequently to prevent a skin from forming on top or the milk scorching on the bottom. Use your thermometer and bring the milk up to 85° Celsius (185°F). This step changes the milk proteins so they set properly later and kills competing bacteria.
2
Cool Down (42°C)
Remove the pot from the heat. Let the milk cool down to incubation temperature: 42° Celsius (108°F). To speed this up, you can place the pot in a cold-water bath in your sink. Stir occasionally and watch the temperature closely—if it’s too hot, it will kill your starter bacteria.
3
Add the Starter
Once at 42°C, scoop out a cup of the warm milk and whisk your 2-3 tablespoons of plain yogurt (or your powdered starter) into it until smooth. Then, pour this mixture back into the main pot of milk and whisk gently to ensure it’s evenly distributed throughout.
4
Incubate & Set
Cover the pot (or transfer to jars). Now you must keep it warm (around 40-42°C) and undisturbed for about 7 hours. You can wrap the pot in towels and place it on a heating pad set to low, put it in an insulated cooler, or put it in an oven that is turned OFF but has the internal light ON.
5
Chill
After 7 hours, check if it has set. It should be firm. Once set, move the container to the fridge and chill for at least 4 hours or overnight to firm up completely before eating. Enjoy your homemade yogurt!
Understanding Yogurt Starters
A yogurt starter is a specific blend of bacteria (like L. bulgaricus and S. thermophilus) that consume lactose and turn milk into yogurt. While you can use store-bought yogurt as a starter, using a dedicated powdered culture often yields more consistent and potent results for beginners.
Our Recommended Starter: KefirShop.eu
For consistent, smooth, and creamy probiotic yogurt every time, we recommend the All-Natural Yogurt Starter Cultures from KefirShop.eu.
- ✅ Perfect Blend: Contains essential lactic bacteria for that classic tangy yogurt flavor.
- ✅ Easy to Use: Pre-measured packets (1g makes 1 liter).
- ✅ Consistent Results: Removes the guesswork of using store-bought leftovers.


